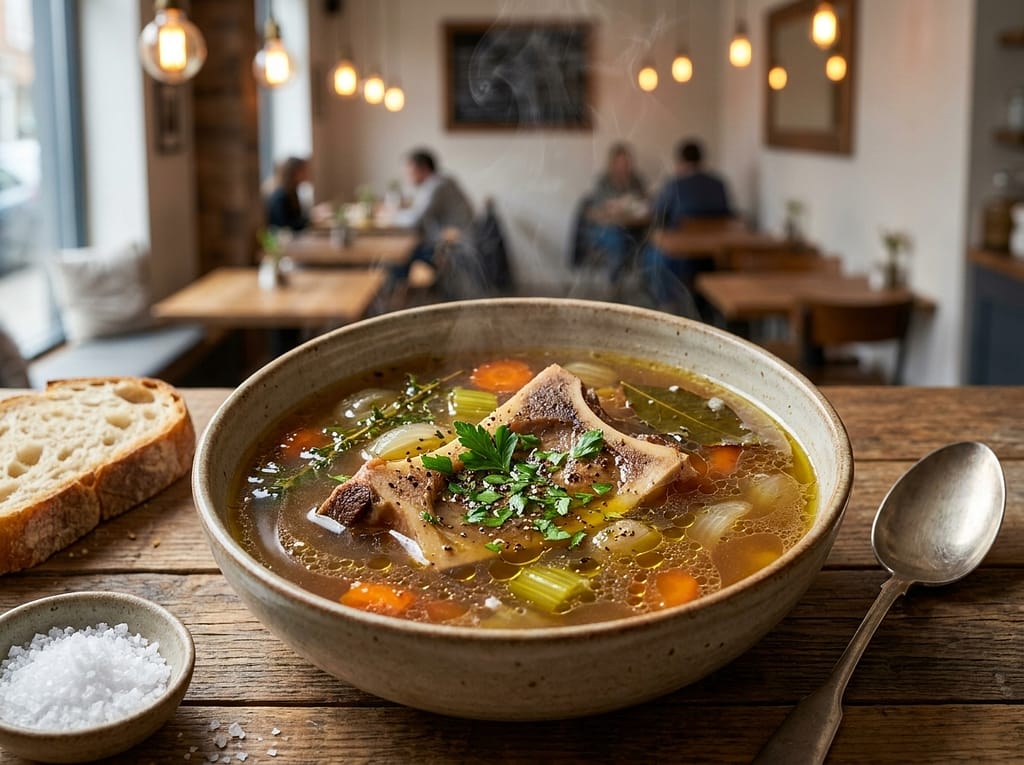
There is a specific kind of magic that happens when your kitchen smells like a warm, slow-simmered hug. You know the feeling: it’s a rainy Tuesday, or you’re fighting off a pesky cold, and nothing in the world sounds better than a steaming mug of something deeply savory, rich, and comforting.
Enter homemade bone broth. If you have ever bought those pricey cartons of store-bought broth only to realize they taste like lukewarm water with a dash of salt, I am about to change your life.
Making an authentic bone broth recipe at home is not just about cooking; it’s a form of culinary therapy. It turns humble, discarded kitchen scraps into a velvety, deeply satisfying, nutrient-dense elixir that wobbles like Jell-O when it cold cures (and yes, that gelatinous wobble is the ultimate badge of honor!).
Grab your favorite soup pot, and let’s make some liquid gold.
What Is Bone Broth?
While “bone broth” might sound like a trendy buzzword invented by wellness influencers, it is actually one of the oldest comfort food recipes in human history.
The Traditional Background
Historically, our ancestors didn’t believe in waste. When they hunted, every single part of the animal was used. Traditional cultures across Europe, Asia, and the Americas realized that by simmering animal bones for an extended period, they could extract incredible depth of flavor and vital nourishment.
Broth vs. Stock: What’s the Difference?
Regular Broth: Made mostly with meat and simmered quickly (1 to 2 hours). It’s thin and light.
Traditional Stock: Made mostly with bones and simmered for 3 to 4 hours.
Authentic Bone Broth: The king of them all. It utilizes collagen-rich bones and is simmered anywhere from 12 to 24 hours. This long, slow bath breaks down the collagen, releasing amino acids and giving the broth its signature creamy, velvety mouthfeel.
Why You’ll Love This Recipe
Unmatched Depth of Flavor: Deeply savory, complex, and infinitely better than anything from a box.
The Ultimate Freezer Meal Prep: Freeze it in silicone trays or jars, and you have a base for quick dinner recipes ready at a moment’s notice.
Budget-Friendly: It turns leftover dinner bones and veggie scraps into gourmet gold.
Incredibly Customizable: You can tweak the herbs, spices, and animal bones to match whatever is sitting in your fridge.
Gut-Healing Comfort: It is the ultimate healthy bone broth recipe, packed with collagen, gelatin, and amino acids that soothe the soul and the stomach.
Servings and Timing
Yield: About 4 quarts (16 cups)
Prep Time: 15 minutes
Cook Time: 12 to 24 hours (for stovetop/slow cooker) or 2 hours (for Instant Pot)
Total Time: 12 to 24 hours
The Ultimate Bone Broth Ingredient List
To create the best bone broth recipe, you need a solid balance of marrow-rich bones, collagen-heavy joints, and aromatic vegetables.
The Base Components
4 pounds high-quality bones (Beef, chicken, pork, or a mix of marrow bones, knuckle bones, and feet)
2 large yellow onions, unpeeled and halved
3 large carrots, cut into thirds (no need to peel!)
3 stalks of celery, including the leaves, cut into thirds
1 bulb of garlic, smashed and cut horizontally
2 tablespoons Apple Cider Vinegar (The secret weapon to extract minerals!)
1 tablespoon whole black peppercorns
3-4 sprigs of fresh thyme and rosemary
2 bay leaves
16-20 cups filtered water (Enough to fully submerge everything)
Ingredient Spotlight: Why They Matter
Choosing the Right Meat and Bones
You cannot make an incredible homemade bone broth recipe with clean, meatless marrow bones alone. You need a mix!
Marrow Bones: Give the broth a rich, buttery, deep flavor.
Knuckle, Joint, and Feet Bones: These are packed with connective tissue. They are absolutely mandatory if you want that prized gelatinous “jiggle” when your broth chills.
The Power of Apple Cider Vinegar (ACV)
Do not skip this! The acid in the vinegar breaks down the hard cartilage and pulls the calcium, magnesium, and collagen directly out of the bone matrix and into your liquid. Don’t worry—your broth won’t taste like salad dressing. The acidity completely cooks off.
8 Incredible Variations To Try
Easy Chicken Version: Use a leftover roasted chicken carcass, chicken wings, and chicken feet for a lighter, classic profile.
Rich Beef Version: Use 100% roasted beef shank, marrow, and knuckle bones for a deeply dark, rich umami flavor.
Spicy Version: Throw in two sliced jalapeños, a thumb of fresh ginger, and a tablespoon of gochugaru (Korean chili flakes).
Slow Cooker Version: Throw everything into a large crockpot and set it on low for 24 hours. Walk away and enjoy your life!
Instant Pot / Pressure Cooker: Short on time? Cook on high pressure for 120 minutes with a natural release.
Restaurant-Style Ramen Base: Add charred ginger, scallions, a splash of mirin, and dried shiitake mushrooms to the simmer.
Budget-Friendly Version: Save all your chicken bones and veggie peelings in a gallon bag in the freezer. When full, dump them in a pot with water and simmer. Cost: practically free.
Vegan “Bone” Broth: While technically a vegetable stock, you can mimic the earthy depth of bone broth by simmering dried shiitake mushrooms, kombu (seaweed), charred onions, and nutritional yeast for 3 hours.
Looking for a specific recipe?
Step-by-Step Cooking Instructions
Step 1: Roasting (The Flavor Anchor)
Preheat your oven to 400°F (200°C). Arrange your animal bones, halved onions, and garlic on a large baking sheet. Roast for 35 to 40 minutes until the bones are deep golden brown and sizzling.
Pro Tip: Skipping this step is a culinary crime. Roasting caramelizes the residual meat and marrow, preventing your broth from looking gray and tasting flat.
[Roasting Bones Process: Raw Bones -> 400°F Oven for 40 Mins -> Deep Golden & Fragrant]
Step 2: The Deglaze
Transfer the beautifully browned bones and veggies into your largest stockpot, slow cooker, or pressure cooker. Pour a little hot water onto the empty baking sheet and scrape up all those delicious, stuck-on brown bits (called the fond). Pour that flavor-packed liquid right into the pot.
Step 3: The Soak
Add your carrots, celery, peppercorns, herbs, and bay leaves. Pour in the filtered water until everything is covered by at least an inch. Pour in the 2 tablespoons of apple cider vinegar. Let the mixture sit cold for 20 minutes before turning on the heat. This gives the acid a head start on breaking down the bones.
Step 4: The Slow Simmer
Bring the pot to a gentle boil over medium-high heat. As soon as it hits a boil, immediately drop the heat down to the lowest setting. You want a lazy simmer—think one individual bubble breaking the surface every few seconds.
For Chicken: Simmer for 12 to 15 hours.
For Beef: Simmer for 18 to 24 hours.
Step 5: Skim the Impurities
During the first 2 hours of simmering, a foamy, gray froth will rise to the surface. Use a fine mesh spoon to skim this off and discard it. It’s totally normal, but removing it keeps your broth tasting clean and bright.
Step 6: Strain and Cool
When your kitchen smells like heaven and the bones easily crumble when pressed, turn off the heat. Use a slotted spoon to remove the large bones and veggies. Strain the remaining liquid through a fine-mesh strainer (or a colander lined with cheesecloth) into a large bowl.
Step 7: The Chill Effect
Let the strained broth cool to room temperature, then place it in the refrigerator overnight. The next morning, you will find a solid, firm layer of white fat on top. Scraping this fat layer off leaves you with pure, glorious, jiggly homemade bone broth. Save that fat (tallow or schmaltz) for roasting potatoes later!
| Broth Element | Target Indicator | What It Means |
| Simmer Style | Lazy, occasional bubbles | Prevents cloudiness, extracts maximum collagen |
| Chilled Texture | Gelatinous, wobbly structure | Perfect collagen extraction achieved |
| Final Color | Deep amber to rich golden | Excellent roasting and caramelization |
Pro Tips for Best Results
Don’t Use Too Much Water: If you fill a giant pot with water and only use two tiny chicken bones, you’ll end up with weak water. The water should just barely cover the bones.
Keep the Onion Skins On: The paper-like skins of yellow onions give the final broth a gorgeous, rich, deep amber color.
Don’t Add Salt Until the End: Because the broth reduces significantly over 24 hours, adding salt at the beginning can cause it to become an absolute salt bomb. Season it right before you drink or store it.
Common Mistakes to Avoid
Boiling Too Hard: If you rolling-boil your broth, you will emulsify the fat into the liquid. You will end up with a cloudy, greasy, bitter broth rather than a clean, velvety one. Keep the heat low!
Using the Wrong Bones: Using only marrow bones will result in a greasy broth with zero gelatin. Make sure you throw in plenty of joint pieces, knuckles, or chicken feet.
Forgetting the Cover: If you simmer uncovered for 24 hours on a stovetop, all your liquid will evaporate into thin air. Keep a lid slightly cracked on the pot.
Beautiful Ways to Serve Your Broth
This is not just a base for easy homemade meals; it is an experience on its own.
The Sipping Mug: Heat up a cup of broth, stir in a pinch of sea salt, a squeeze of fresh lemon juice, and a tiny pinch of cayenne pepper. It’s better than morning coffee.
The Ultimate Noodle Bowl: Pour boiling broth over cooked ramen noodles, fresh baby spinach, a soft-boiled egg, and a drizzle of toasted sesame oil.
Gourmet Garnish ideas: Elevate your bowl with chopped scallions, microgreens, a splash of high-quality soy sauce, or a spoonful of crispy chili crunch.
Storage & Reheating Guidelines
In the Fridge: Store your cooled broth in airtight glass jars for up to 5 days.
In the Freezer: Leave an inch of headspace at the top of glass jars (so they don’t crack as the liquid expands) and freeze for up to 6 months. Alternatively, freeze them in silicone ice cube trays for easy portioning.
Reheating: Never microwave your pristine broth if you can avoid it! Gently warm it in a small saucepan over medium-low heat until it melts back into a beautiful liquid and comes to a light simmer.
Is It Healthy?
Absolutely. This is the definition of a functional, nutrient-dense superfood.
A single cup of high-quality bone broth is loaded with easily absorbable protein (in the form of collagen), contains virtually zero carbohydrates, and is incredibly low-calorie while remaining completely satisfying. The naturally occurring amino acids like glycine and proline are widely celebrated for supporting gut lining integrity, joint health, and glowing skin. It’s essentially a beauty serum you can eat!
Frequently Asked Questions
Why didn’t my bone broth gel?
If your broth didn’t turn into jelly when cold, don’t panic! It still tastes amazing and is full of nutrients. It usually means you either used too much water relative to the amount of bones, or you didn’t use enough collagen-rich pieces (like knuckles, feet, or wings).
Can I reuse the bones for a second batch?
Yes! This is called a remouillage in French cooking. You can simmer the same bones a second time for a lighter broth, which is fantastic to use as the water base for cooking rice, quinoa, or grains.
Why does my broth smell a little funky while cooking?
Bones contain marrow and minerals that can release a distinct, earthy smell during the first few hours of cooking. Adding aromatics like celery, onions, and bay leaves early on helps mask this and creates a lovely kitchen aroma.
Can I make this without a stove?
Yes. If you are nervous about leaving your stovetop burner on overnight, using a slow cooker on low or an Instant Pot on the pressure cook setting are incredibly safe and effective alternatives.
Where do I buy bones for bone broth?
Ask the butcher at your local grocery store counter! They often keep a stash of beef knuckles and marrow bones in the back freezer specifically for broth-making at an incredibly low price. You can also save carcasses from your own home-cooked meals.
Should I remove the fat layer before storing?
Leave the fat layer on while the broth is sitting in the fridge! That solid white disc of fat acts as a natural, airtight protective seal that keeps the broth fresh underneath. Simply scrape it off right before you plan to use or freeze the broth.
Final Thoughts: Sip, Savory, and Smile
There is nothing quite like holding a warm mug of homemade bone broth between your hands on a cold day. It takes a little bit of patience, but the payoff is a rich, soothing, and deeply comforting elixir that beats anything you can buy at a grocery store.
The next time you make a roast dinner, don’t throw away those bones. Give them a second life in a slow-simmering pot of water, and watch them transform into pure culinary gold. Happy cooking, friends!
_____Amelia Grace.